Ubuntu, the popular open-source operating system that's easy to install and use. Trying out this Linux distribution on your Mac is easy. With an application called VMware Fusion, you can create a "computer within a computer" and run Ubuntu in a virtual machine on your Mac.
Here's how to install Ubuntu 11.10 in OS X using VMware Fusion:
- Download Ubuntu 11.10 It's a free download. Both the 32- or 64-bit versions work, but the 32-bit version is recommended.
- If you haven't already, download the VMware Fusion application. There is a free 30-day trial available. If you decide you want to keep it, you can purchase it for $49.99 as of December 2, 2011.
- Open the VMware Fusion application.
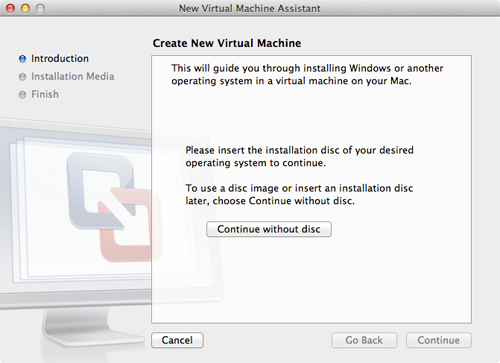
- From the File menu, select New. The New Virtual Machine Assistant window shown below appears.
- Click Continue without disc. The window shown below appears.
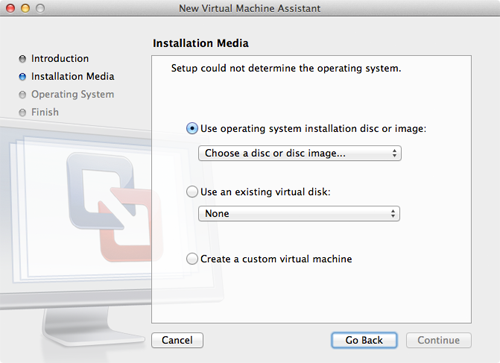
- Click the Use operating system installation disc or image button, if it is not already selected.
- To install Ubuntu from the .iso file you downloaded, select Choose a disc or disc image... from the menu with the same name. The selection window appears. Select the .iso file you downloaded from the Ubuntu website, and then click Open. The .iso file appears in the menu as shown below.
- Click Continue. The window shown below appears.
- VMware Fusion analyzes the .iso file and automatically detects the operating system (Ubuntu) you are about to install. Click Continue. The window shown below appears.
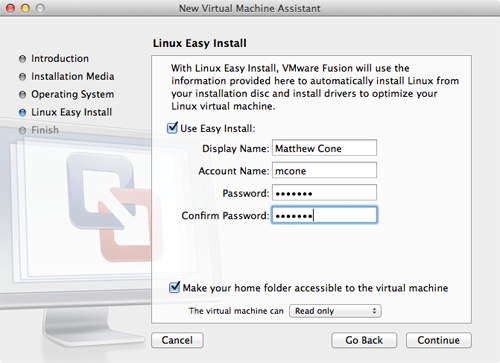
- The "Easy Install" option automates part of the Ubuntu configuration during installation. Enter your name, a username, and password (6 characters or longer) and VMware Fusion will provide that information to the installer to automatically set up your account in Ubuntu.
- If you'd like to be able to access the files in OS X from Ubuntu, select the the Make your home folder accessible to the virtual machine checkbox. By default, the virtual machine will only be able to read the files, not write to them. The Read only option is a security precaution designed to protect your files in OS X - the Ubuntu virtual machine will not be able to change or delete the files. On the other hand, selecting the Read & Write option allows you to save files to your home folder in OS X from Ubuntu, but it also raises the probability of accidents occurring.
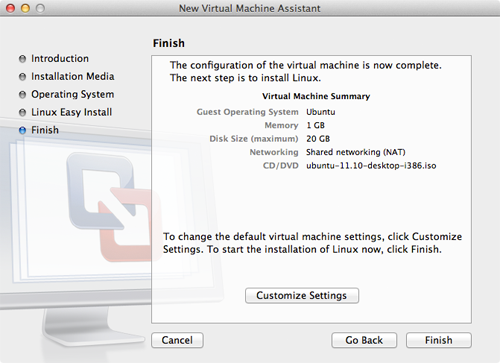
- Click Continue. The window shown below appears.
- VMware Fusion displays a summary of the virtual machine you're able to create. By default, it will allocate 1GB of RAM and a maximum of 20GB of your computer's hard disk space to Ubuntu. (The virtual machine only uses the amount of space necessary - the base installation only consumes about 4GB of hard disk space.) You could customize these settings now, but it's not necessary right now - you can always change them later by selecting Virtual Machine → Settings after the virtual machine has booted. ClickFinish.
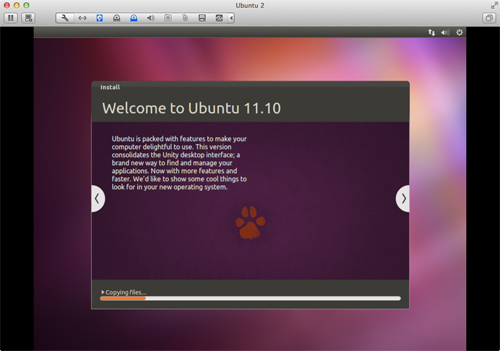
- You are prompted to save the virtual machine to your hard disk. Leave the file name and location set to the default settings. Click Save. VMware creates and boots the virtual machine. Ubuntu starts installing, as shown below. Go get a cup of coffee - this can take up to half an hour.
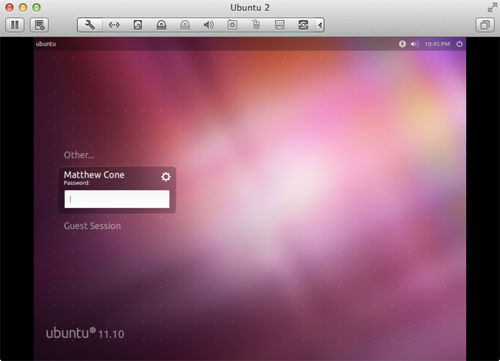
- Keep an eye on the virtual machine. When Ubuntu is finished installing, you'll see the login screen, as shown below. Enter your password and press Return. You're logging in to Ubuntu!
- Now you're in Ubuntu. Don't worry if it looks a little weird at first. It takes VMware Tools a couple minutes to detect your screen's resolution and adjust Ubuntu accordingly. Once the resolution has changed, you can click the "Dash home" button in the top-left corner to play around with the new unity user interface, as shown below.
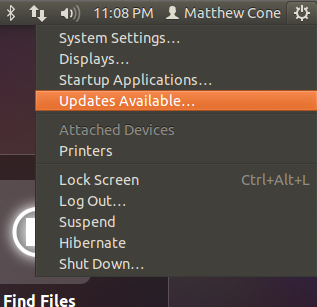
- One thing you'll want to do right away is install updates for Ubuntu and the installed applications. To do that, click the gear menu and select Updates Available, as shown below. We had over 250 updates to install!

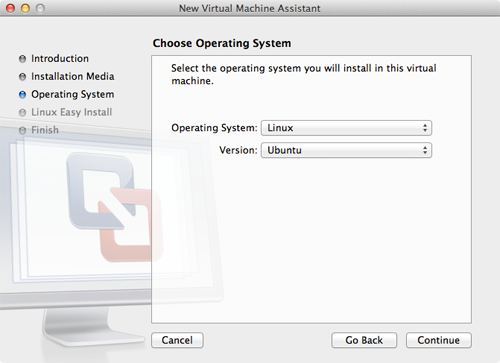
Note: There are two Ubuntu options in the Versions menu: Ubuntu for the 32-bit version of the operating system, and Ubuntu 64-bit for the 64-bit version. Make sure the version selected matches the .iso file you downloaded.
Note: VMware Tools, the set of helper utilities for Ubuntu, should be automatically installed during this process. There is no need to install them after you log in for the first time.

After you install the updates and restart the virtual machine, you're ready to rock and roll. Ubuntu is yours to discover!
Retweet this story