Note: Windows 8 probably won't be officially released until later in 2012. You can currently download and install the developer version of the operating system for free.
Here's how to install Windows 8 on your Mac using VMware Fusion:
- Download the Windows 8 .iso file from the Microsoft Windows Dev Center. It's currently a free download. The 64-bit version is recommended. (Unless you'll be coding, you don't need to download the file with the developer tools.)
- If you haven't already, download the VMware Fusion application.
- Open the VMware Fusion application.
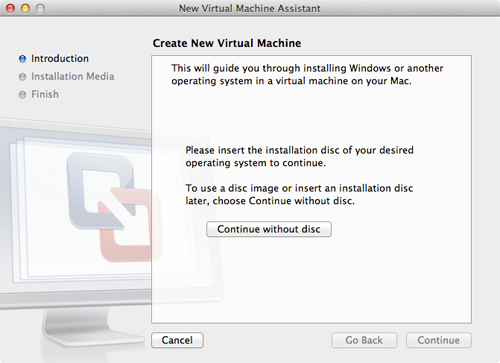
- From the File menu, select New. The New Virtual Machine Assistant window shown below appears.
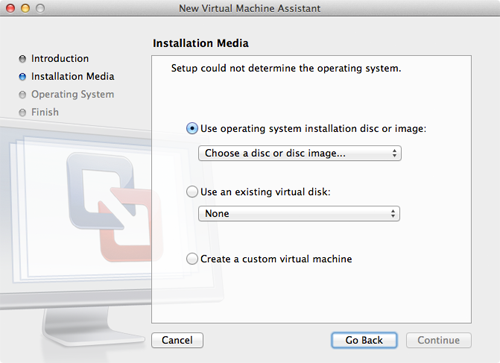
- Click Continue without disc. The window shown below appears.
- Click the Use operating system installation disc or image button, if it is not already selected.
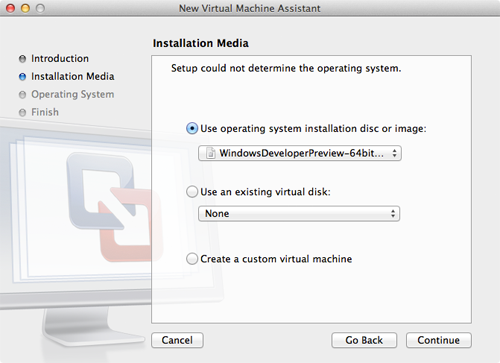
- To install Windows 8 from the .iso file you downloaded, select Choose a disc or disc image... from the menu with the same name. The selection window appears. Select the .iso file you downloaded from the Microsoft website, and then click Open. The .iso file appears in the menu as shown below.
- Click Continue. The window shown below appears.
- From the Operating System menu, select Microsoft Windows.
- From the Version menu, select Windows 7 x64 if you downloaded the 64-bit version of Windows 8, or Windows 7 if you downloaded the 32-bit version.
- Click Continue. The window shown below appears.
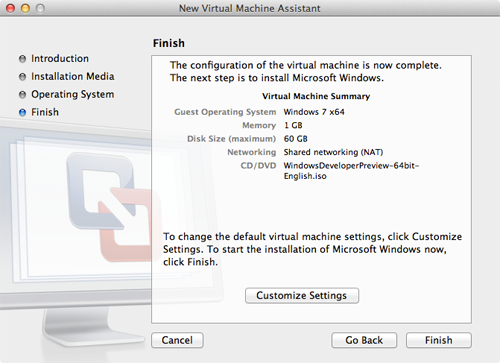
- VMware Fusion displays a summary of the virtual machine you're able to create. By default, it will allocate 1GB of RAM and a maximum of 60GB of your computer's hard disk space to Windows 8. (The virtual machine only uses the amount of space necessary - the base installation only consumes about 4GB of hard disk space.) You could customize these settings now, but it's not necessary - you can always change them later by selecting Virtual Machine → Settings after the virtual machine has booted. ClickFinish.
- You are prompted to save the virtual machine to your hard disk. Leave the file name and location set to the default settings. Click Save. VMware creates and boots the virtual machine. The window below appears after Windows 8 boots for the first time.
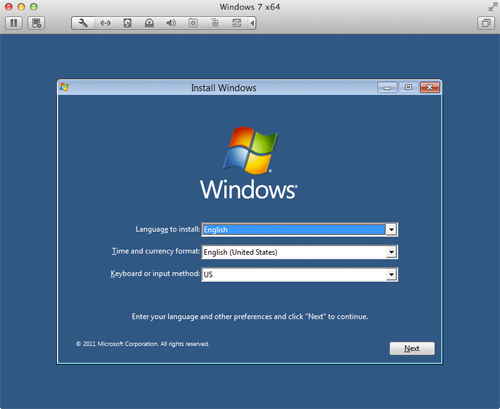
- Select a language, time format, and keyboard layout.
- Click Next. The window shown below appears.
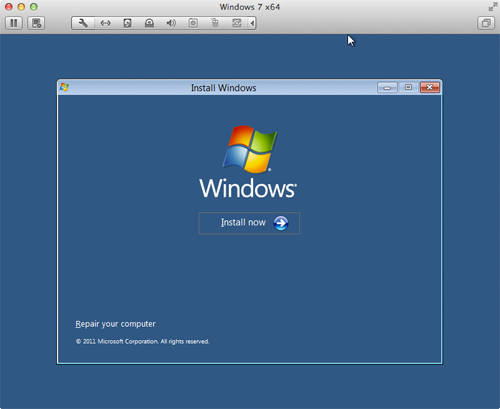
- Click Install Now. The window shown below appears.
- Select the I accept the licence terms checkbox.
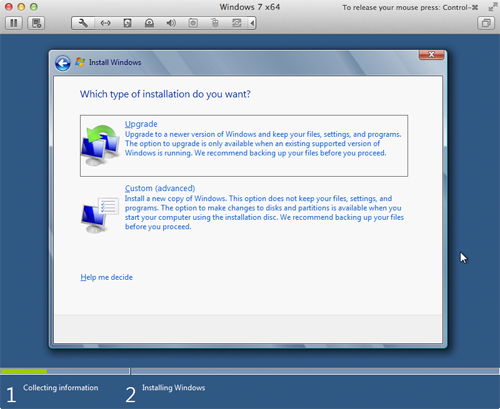
- Click Next. The window shown below appears.
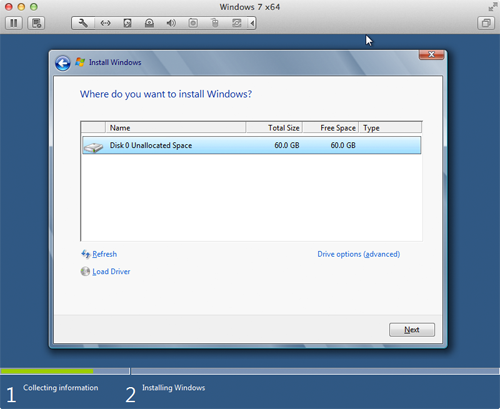
- Click Custom (advanced). This tells Windows 8 that you are installing it on a fresh hard disk. The "hard disk" is virtual, of course, but Windows 8 doesn't know that. The window shown below appears.
- The virtual hard disk should be the only option displayed. Select it, and then click Next. The window shown below appears.
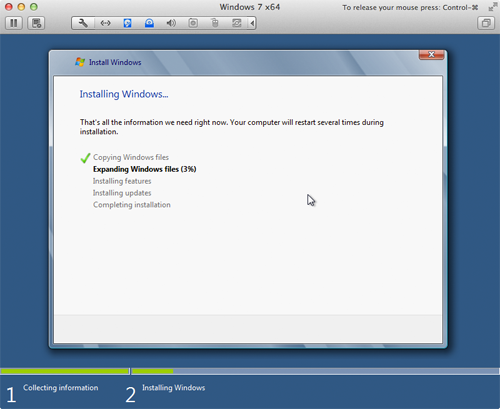
- You've finished providing information and Windows 8 is finally installing. Go get a cup of coffee - this can take up to half an hour. When the installation process is finished, the window shown below will appear.
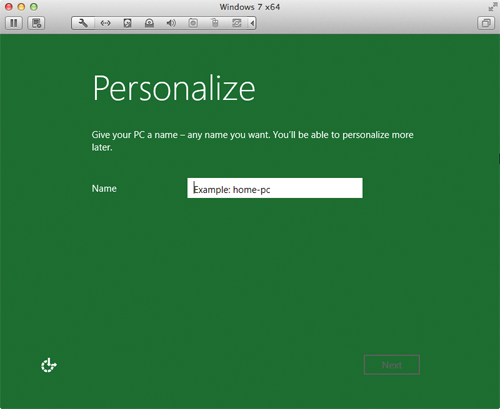
- Aha! You only though you were finished providing information. Now you need to type a name for the virtual Windows 8 computer and click Next. The window shown below appears.
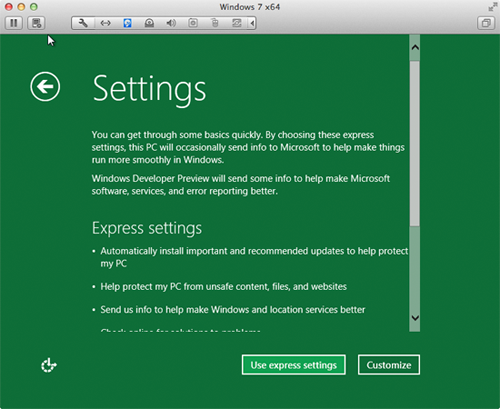
- Do you want to customize all of these settings? Probably not right now, at least not for this Windows 8 preview running in a virtual machine. Click Use express settings. The window shown below appears.
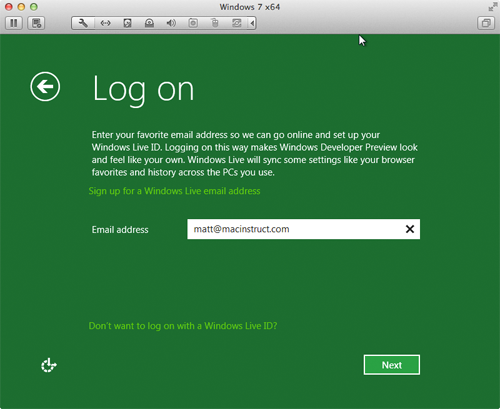
- If you have a Windows Live ID, enter the email address you use for that account. Otherwise, just type your email address and click Next. The window shown below appears.
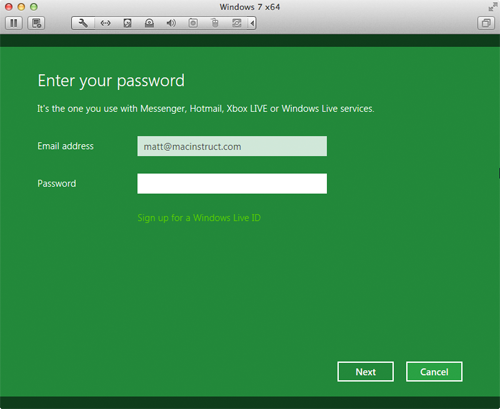
- Enter the password for your Windows Live ID, or click Sign up for a Windows Live IDand follow the instructions. When finished, click Next.
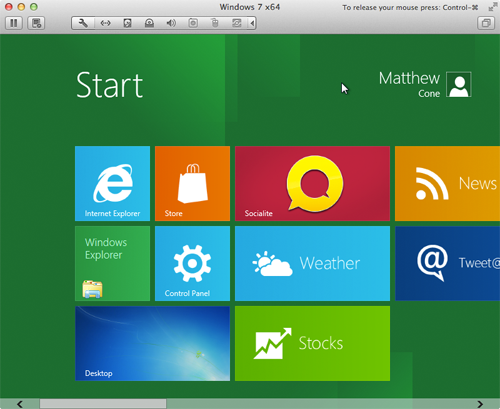
- Windows "finalizes your settings" and "prepares your PC." (Sorry, the Microsoft-speak is too funny!) Once it's done, your virtual machine will be booted into Windows 8, as shown below.
- As you can tell from the screenshot, this version of Windows is radically different than previous versions. Or is it? Click the Windows Explorer button and you're back in the familiar looking Windows interface. Go ahead and click that button now. (You can always click the Windows "Start" button to get back to the new Windows 8 interface.)
- The last thing we need to do is install VMware Tools. This package makes Windows 8 look and feel better inside the virtual machine on your Mac. To get started, select Install VMware Tools from the Virtual Machine menu.
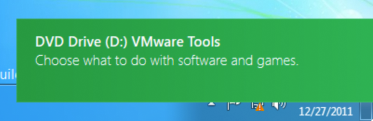
- VMware asks you if you want to connect the VMware Tools installer to the virtual machine. Click Install. The dialogue shown below appears in the virtual machine.
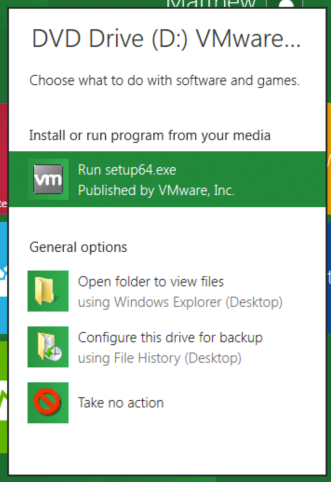
- Click that dialogue window. The window shown below appears.
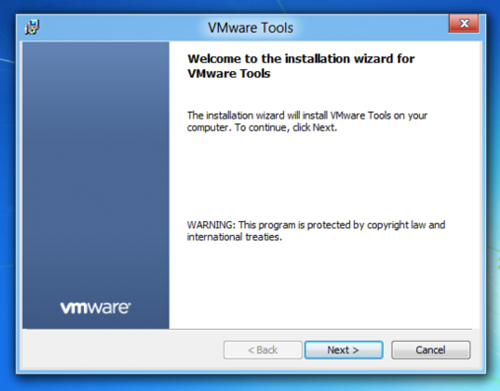
- Click Run setup64.exe. The VMware Tools installer appears, as shown below.
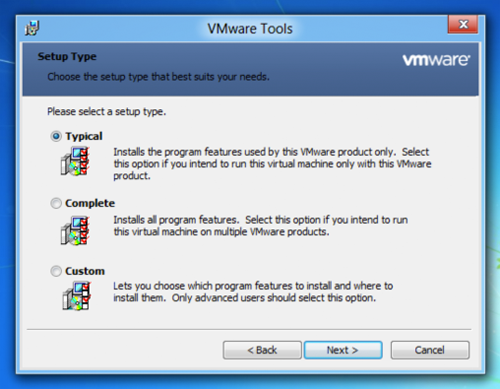
- Click Next. The window shown below appears.
- Select Typical, and then click Next.
- Click Install. VMware Tools installs on the Windows 8 virtual machine. Once the installation completes, you'll need to restart the virtual machine. When it turns back on, the display should look crystal clear - that's how you know that you successfully installed VMware Tools in the virtual machine running Windows 8!
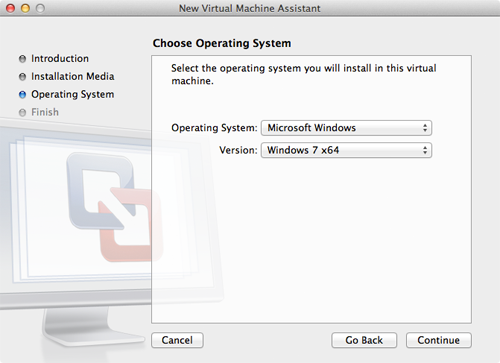
Note: Don't worry about "Windows 7" part. All this means is that VMware Fusion doesn't have a preset virtual machine for Windows 8 yet.)

Now you have Windows 8 running in a virtual machine on your Mac. A lot has changed since Windows 7, so have fun messing around!
submitted by guest bloger
vicky sanchezhamburg, Germany
Retweet this story
submitted by guest bloger
vicky sanchezhamburg, Germany
No comments:
Post a Comment