Upgrading the RAM is one of the cheapest and most effective ways to boost your computer’s overall performance. RAM, or random access memory, stores the code and instructions for OS X and any applications open on your Mac. Installing larger RAM modules in your MacBook Pro will allow you have more applications open at once and perform more tasks simultaneously. For example, you could open a bunch of memory-hogging applications while ripping a CD, watching a DVD, and uploading photos to the Internet - all at the same time. And if you install more RAM in an older MacBook Pro, you could see a big difference in the way your computer performs everyday tasks, like loading websites.
Note: These instructions are for the MacBook Pro only. The MacBook Air has RAM modules that are permanently attached (soldered) to the logic board, so you can't replace the RAM modules in any of the MacBook Air models.
How to Find New RAM
Different MacBook Pro models use different RAM modules, so before you do anything, find out which RAM modules your laptop accepts.
RAM modules usually come in pairs. For example, the 2011 MacBook Pros come with 4GB of RAM, which is really a set of two 2GB RAM modules. To upgrade the RAM, you need to purchase a pair of larger modules, like two 4GB modules for a total of 8GB of RAM. (For the true geeks, Other World Computing also has 8GB modules available for a grand total of 16GB of RAM.) The modules in the pair should be the same size - you probably wouldn’t want to use a 2GB and 4GB module together.
Shop around for the best deal, and don’t buy the cheapest brand. Major retailers like BestBuy sell RAM, but it can be nearly twice as expensive as the modules available online!
Taking a Peek Under the Hood
Your MacBook Pro has lots of internal components hidden under the case, as shown in the image below. You don’t want to touch most of these components—doing so could harm your Mac. When replacing your RAM modules, follow the instructions carefully and try not to touch any of the other components.
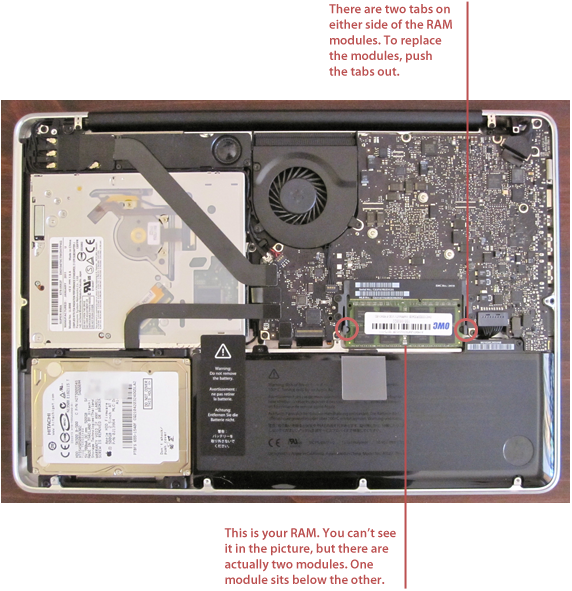
It's worth noting that the placement of components varies from Mac to Mac. Apple made the RAM and hard drive accessible in most models, but some Macs - like the Mac Mini - are notoriously difficult to upgrade. Fortunately, the MacBook Pro has RAM modules and a hard drive that are easy to replace.
Upgrading the RAM in Your MacBook Pro
Once your new RAM modules arrive, set aside about half an hour to perform the replacement. Be mindful of your environment. Static electricity discharges can zap components, so a fleece pullover isn’t the smartest thing to wear. Try to find a flat, clean surface to work on. And keep pets and children out of the way - you don’t want any hairballs or spilled drinks in your MacBook’s innards.
Here’s how to upgrade your MacBook Pro's RAM:
- Disconnect the power cord and turn your Mac over.
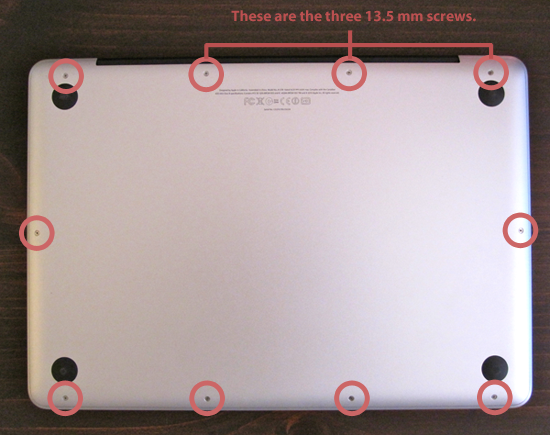
- Remove the ten screws on the back of the case. There are seven 3 mm screws, and three 13.5 mm screws, as shown in the image below. The screws are very small - don’t loose them!
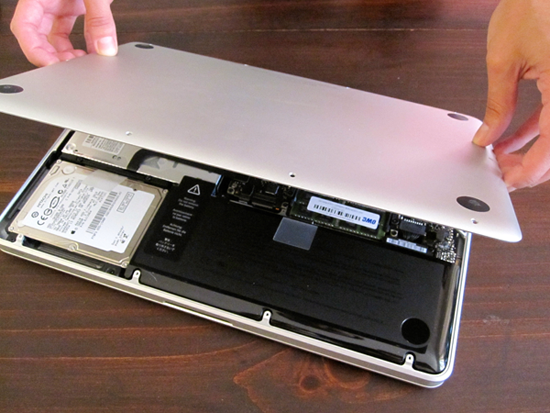
- Gently lift the case backing and tilt it towards the rear of the computer, as shown below.
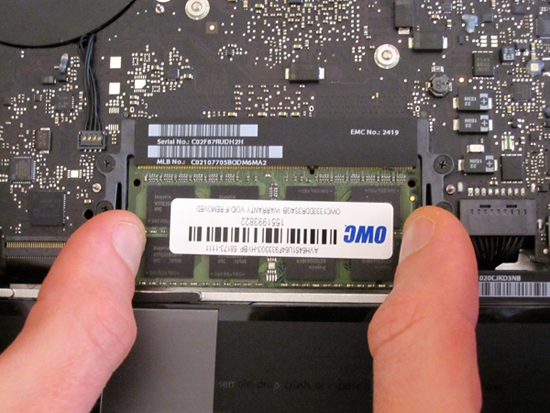
- Push out the tabs on both sides of the RAM module, as shown below. These tabs keep the RAM module firmly tucked in to the logic board - pushing them out causes the RAM module to pop up.
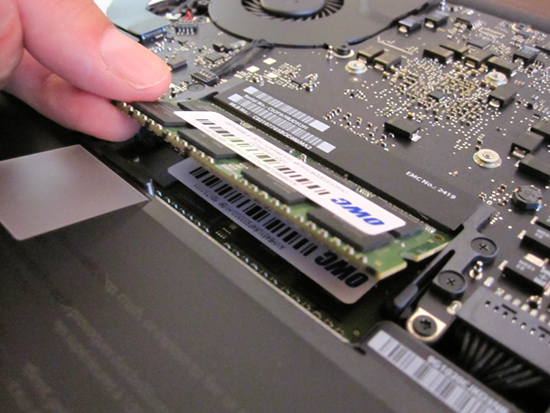
- After the RAM module has popped up, pull it back out of the socket, as shown below.
- There’s still another RAM module in there. Push out the tabs on both sides of the RAM module, just like you did for the first RAM module.
- After the RAM module has popped up, pull it back out of the socket.
- Now you can insert the new RAM modules. Take one of the new modules and firmly slide it in to the socket closest to the logic board.
- After the RAM module is set in the socket, press it down until it clicks in to the tabs.
- Repeat the process for the second RAM module. Insert it in to the top socket, and then press it down until it clicks in to the tabs.
- Gently place the case backing onto the top of the case.
- Replace and tighten the screws.
That’s it! Reconnect the power cord and start your Mac—you can check that the RAM is working by selecting About This Mac from the Apple menu.