Saturday, July 6, 2013

Disabling Bing From the Windows 8.1 Search Engine

Windows 8.1 includes online search results from Bing whenever you search for something on your system. Since many people aren’t going to want this, here is how to get rid of this behavior.
Note: obviously it could be a useful feature if you really want it — but then again, if you are searching for something very personal on your own computer, you don’t really want that search being sent over to Bing. I mean, we should make the NSA work for it a little bit, right?

How to Disable Bing From the Internal Search Engine on Windows 8.1

Press the Win + C keyboard combination to bring up the Charms Bar and then click on the settings charm.
Near the bottom right hand corner of your screen you will have an option to “Change PC settings”, and you should click on it.
Now head into the Search & Apps section of the PC settings panel.
Here, on the right hand side you will see an option to disable search results from Bing, which you’ll want to flip to Off.
That’s all there is to it.
Retweet this story

Friday, July 5, 2013

How to Find Your Lost Android Phone, Even if You Never Set Up a Tracking App

nasa-blue-marble-header[3]
Android doesn’t come with a “find my Android” feature, so there’s no official way to track your phone if you lose it. You should prepare your phone for loss by setting up such a tracking app — but what if you didn’t?

How It Works

Most lost-phone-tracking Android apps must be set up ahead of time. However, there’s a reason Plan B works (if you have a Gingerbread device, at least). That’s because Android allows you to remotely install apps — click the Install button on the Google Play website and the app will be remotely downloaded to your device, assuming it’s turned on, connected to the Internet, and configured to use the same Google account. If the app can set itself up, you should be able to remotely locate your phone.


Read:  

Sending a movie in an iPhone


While Plan B doesn’t work, Android Lost does. To set up this app, you can interact with the app on your device — or you can send a special SMS message to your device. Assuming you have access to someone else’s cell phone, you can push the Android Lost app to your lost phone, send an SMS message, and then it will be linked to your Google account. You can then log in with your Google account on the Android Lost site and locate your phone.

Using Android Lost

First, install the app. Open the AndroidLost page on Google Play. Click the Install button and remotely install the app to your lost phone.
Next, you’ll need to activate Android Lost. Since you don’t have your phone, you’ll need to send an SMS message to your phone for this to work. Use another phone and send a text message with the following content to your lost phone:
androidlost register
Your phone’s Google account should now be registered with Android Lost, assuming it’s powered on and has a connection. You can now open the Android Lost website, click the Sign In link, and log in with the Google account you use on your Android phone.
Access the Controls page after logging in with your Google account, and you’ll be able to track and control your phone remotely. You may have to wait a little while before your phone becomes registered. In addition to requesting the phone’s location, you can also activate a loud alarm that will make the phone’s screen flash — particularly useful if you think you’ve misplaced the phone somewhere nearby and need to track it down.
After your phone sends its location back, you can view it and click a link to open it on an interactive Google Maps page.
You may have to wait a little while for the phone to become registered. If you have pushed the app and sent the SMS message and the phone never becomes registered, it’s possible that it’s powered off, has no signal, or — worse — that someone has wiped the phone and you won’t be able to track it because it’s no longer linked to your Google account.

If you’ve lost your phone and never set up a tracking app ahead of time, Android Lost is the best you can do at the moment.
Other apps can send your phone’s location in the background (so you can view it even if your phone has been off), remotely wipe your phone, or install themselves deep into your phone’s storage so they can persist across wipes (this requires root access). However, you’ll have to set up such apps ahead of time.
Retweet this story

How to Stop OS X from Changing the Display Brightness Automatically

After getting a new MacBook Air and deciding to try out OS X for a while, I started wondering why the battery would suddenly start dying really fast, but only when I was sitting at the kitchen table. That’s when I noticed the display brightness kept changing on its own… and realized the problem.
OS X, just like your phone, and any modern device, tries to figure out the brightness of the room you’re in, and adjust the brightness of the screen. If you are over in Windows, it’s called “Adaptive” brightness, while your phone will just call it “Auto”. While this technology is great in theory, I don’t really need max brightness all the time, and I like to control it manually to make sure I’m getting the best battery life.
Open up System Preferences, head to Displays. Then uncheck the Automatically adjust brightness setting.
The difference in battery life is enormous, so your best bet is to keep the brightness fairly low.
Retweet this story

How to Use Quick Toggles on Your Android Phone

android-notification-toggle-in-action
One of the big new features in Apple’s iOS 7 is Control Center, which allows you to quickly access and toggle common setting from anywhere. However, Android phones have had quick toggles for a long time.
Android now has its own built-in quick toggles, while popular manufacturer-customized interfaces like Samsung’s TouchWiz have their own quick toggles, which work differently. You can also add custom quick toggles in different places.

Android’s Quick Toggles

Android 4.2 comes with its own, integrated quick toggles. However, these may be hidden by your manufacturer. Assuming you’re using an Android 4.2 device with them enabled — such as a Nexus device like the Nexus 4, Galaxy Nexus, or Nexus 7 — you can use the quick toggles to quickly access common settings from anywhere in Android.
To access the quick toggles, either pull down the notification drawer at the top of the screen and tap the button in the top-right corner, or pull down the notification drawer with two fingers to go directly to the quick toggles. On an Android tablet like the Nexus 7, pull down from the top-right corner of the screen and you’ll see the toggles appear — you have to pull down from the top-left corner of the screen to access the notification area.
Here you’ll find quick access to common settings, like brightness, Wi-Fi, battery, Bluetooth, and airplane mode. Some options, like the airplane mode button, function as a quick toggle, while others, like the battery icon, open the appropriate settings screen.

Samsung’s Quick Toggles

Samsung added quick toggles to its TouchWiz custom interface long before Google added them to Android. If you have a Samsung device, just pull down your notification drawer and you’ll see quick toggle icons appear at the top of the drawer. Tap the icons to quickly toggle the common settings.
Other manufacturer’s custom skins may have similar quick toggles built into the notification area. If you like this feature and you’re using a device without them, you can also add quick toggles to the notification area on any Android device — see below for more information.

Widgets

Android supports widgets on its home screen, and these widgets can function as quick toggles. In fact, Android includes a special widget for quickly toggling settings. You just have to add it to your home screen.
First, open your app drawer and tap the Widgets tab at the top of the list. Swipe over until you locate the Power Control widget, then long-press it and drop it on your home screen.
You now have a widget that allows you to quickly and easily disable Wi-Fi, Bluetooth, GPS, Sync, and control your brightness settings from the home screen. Just tap the appropriate icon. The widget can be placed anywhere on any of your home screens.
Of course, this is just the quick toggle widget included with Android. If you would like to control different options from a quick toggle, you can install third-party widgets from Google Play. Widgets may be in the form of a single icon that controls a single setting or another large widget with multiple options.

Notification Area

If you like Samsung’s notification-area toggles and wish your device had them, you can get them with a third-party app. Just install the Notification Toggle app from Google Play. It allows you to customize and control the toggles that will appear in your notification area — everything from Wi-Fi and Bluetooth to a flashlight and music control buttons.

Lock Screen

Android 4.2 also supports lock-screen widgets, so you can add widgets to your lock screen that function as quick toggles. Theoretically, a lock-screen widget could toggle these common settings, but it would be odd to give access to such powerful options from the lock screen.
However, with the right widget installed, you can quickly control important options without unlocking your phone. For example, the Nexus 4 flashlight widget offers a lock-screen widget that quickly toggles the Nexus 4′s camera flash LED on and off so it can be used as a flashlight without unlocking your phone.

Thanks to Android’s flexibility, you can place quick toggles almost anywhere in the operating system. A developer could even implement quick toggles as a floating app that would appear over every app you used. Sure, it would be inconvenient in most circumstances, but it illustrates how much flexibility Android offers
Retweet this story

How to Sync Files Between Computers Without Storing Them in the Cloud

clear-sky-without-clouds
So you have multiple computers and you want to keep your files in sync, but you don’t want to store them on someone else’s servers. You’ll want a service that synchronizes files directly between your computers.
We’re focused on syncing files over the network here — either over a local network or the Internet. We’re looking for Dropbox-style solutions that don’t store files on a central server like Dropbox does.

BitTorrent Sync

BitTorrent Sync uses BitTorrent to transfer files — in private and in encrypted form, so no one can snoop on them. Just install it, select a folder, and generate a secret. Provide that secret to anyone — either another computer you own or a friend you would like to sync files with — and your folder will be automatically kept in sync across all configured PCs. This happens directly — either over a local network or over the Internet — using the powerful and fast BitTorrent technology.
BitTorrent Sync offers clients for Windows, Mac, and Linux, so you can use it to sync your files with computers running any popular operating system. Unlike many other services, its features are completely free and it doesn’t require you run a separate server.

AeroFS

AeroFS is free, assuming you don’t need its more advanced features. It creates a Dropbox-like folder on your computer and files sync automatically between the computers you set up. You can share each folder with one additional person, but you’ll need the paid version to share with additional people after that. It doesn’t use BitTorrent and relies on a user account system — there’s a central server that manages user accounts and sharing, but files aren’t hosted on AeroFS’s servers. They’re only stored on your computers. AeroFS promises that it “can’t even see your file names.”
Its interface is very similar to Dropbox’s, even down to the tour that appears when you install it. It’s a very Dropbox-like solution, but it skips the cloud so you can sync unlimited files. Like Dropbox, it supports Windows, Mac, and Linux.

Cubby

LogMeIn’s Cubby offers cloud storage, but it also offers a “DirectSync” feature. DirectSync allows you to synchronize an unlimited number of files directly between computers, skipping the cloud. Microsoft’s Windows Live Mesh used to do this, but Live Mesh has been discontinued. Cubby is available for both Windows and Mac OS X; there’s no Linux support.
You will have to create an account, and cloud storage is enabled by default in Cubby. While DirectSync was previously free when we recommended it as an alternative to Windows Live Mesh, DirectSync is now a paid feature. Unless you really love Cubby, you’re probably better off with another solution.

Roll Your Own Server

These are the two biggest options. However, these aren’t the only ways to sync files directly between your own computers. There are other options you have, although those solutions aren’t as easy to use and will require more manual configuration:
  • SparkleShareSparkleShare is an open-source Dropbox-like file syncing solution. The only difference is that you host it yourself. You could host Sparkleshare on one of your computers or on a server you have access to and get Dropbox-like syncing that’s entirely under your control.
  • rsyncrync isn’t an instant syncing solution, but it can be used to run automatic incremental backups to a server. You could run a nightly rsync job and sync your files to an FTP server.
There are many other options you can use. Anything with a self-hosted server component or any sort of solution that automatically creates incremental backups and uploads to a remote server will do, but you’ll have to host your own server software in both cases. Solutions like BitTorrent Sync and AeroFS are the most convenient because they’re not made to require a separate server — they just run on your existing computers.

Disadvantages

Of course, there are a number of disadvantages to doing it this way. You’ll have to ensure you have backup copies of your files, as there’s no central backup copy in the cloud on someone else’s servers. There’s also no way to access these files from your phone or tablet with a mobile app, as you can with the Dropbox, Google Drive, or SkyDrive mobile apps. They’re not stored on a central server the apps can pull from; they’re just automatically synced between your computers.
And, of course, your computers must be powered on at the same time or they won’t be able to sync directly with each other.
In return, you get the ability to sync an unlimited number of files and keep them entirely under your control. It’s up to you which tradeoffs you want to make.

Do you use another solution to sync your files and skip the cloud? Leave a comment and share it with us!
Retweet this story

How to Fix Flash Videos Having No Sound in Chrome on Mac OS X

My new MacBook has had a weird issue lately — for some reason, there isn’t any sound when I play a web video in Chrome. There’s nothing wrong with Chrome, or the sound, but it just wasn’t working. After some digging, I figured out that it is just Flash related.
Turns out, the real problem is a conflict between the built-in Flash plugin in Chrome, and the Adobe one that I must have downloaded elsewhere.
And the solution is to remove one of them. In this case, the built-in one. Start by typing about:plugins into the location bar.
Then click the Details link on the right-hand side of that page.
And then disable one of the two plugins that are loaded, since you should only have one. In my case, the sound didn’t work until I disabled the built-in “Pepper” Flash player, but your mileage may vary.
Note that you’ll need to reload the tab that you are testing for the plugin situation to resolve itself. Or you could close your browser and re-open.

Retweet this story

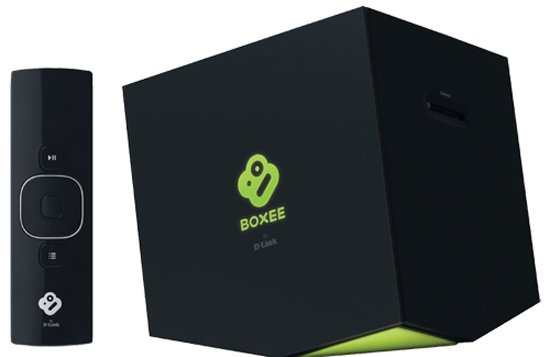
Samsung Electronics has bought Boxee


Samsung Electronics has confirmed its purchase of Boxee on Wednesday for its smart TVs

Samsung plans to use this acquisition as a way to improve user experience. Many have complained about Samsung's smart TVs being difficult to use. Samsung will be acquiring not only assets but also talent from its purchase of Boxee; Samsung says it will keep about 40 of Boxee'e employees after the purchase. Boxee started out offering open-source media software. Eventually, it stopped to focus on selling its own device with its software. It is likely that this software will find itself on Samsung's smart TVs in the near future. Boxee's system has been very popular and should improve the ease of use of the smart TVs. 

Boxee was looking for funding, initially, and switched gears a few months ago to look for a potential buyer. This offer is lower than what Boxee wanted, but the start-up says, in a letter posed on their website, that they are excited to be a part of shaping the future of TV. They also wanted to let their users know they are working to make sure there isn't a huge disruption for their devices and thank them for their continued support over the last six years. 
Retweet this story